
I Made Kombucha in a Super-Fancy French Fermenting Jar and Here’s What I Thought
I absolutely love kombucha. What I absolutely don’t love is paying $5 a bottle for it — especially now that I’ve gotten my husband and my youngest daughter hooked on it too. With them guzzling down my precious stash, kombucha has morphed from a virtuous, gut-friendly mode of hydration to a flat-out budget buster.
Instead of giving up the tart, refreshing, fermented tea drink, I decided to try making it myself. I’ve wanted to do this for ages, but could never drum up the courage. I kept envisioning my countertops lined with sticky, murky jars draped with flaccid cheesecloth and filled with slime. Gross.
And then I saw this Montreal-made beauty.
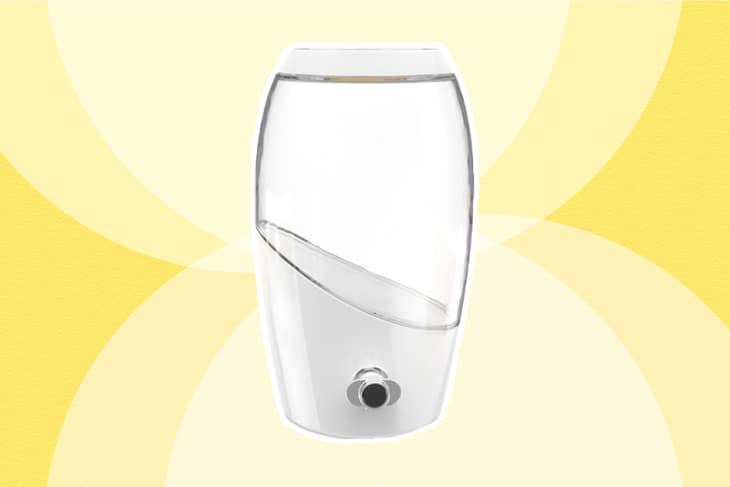
Buy: Mortier Pilon Kombucha Brewing Jar, $59
The Mortier Pilon kombucha brewing jar looks cool, sleek, and almost cheerful, so it wouldn’t be a big deal to have it out on the counter. It has its own airflow screen with a cute pattern, plus a spigot on the bottom for easy pouring. I had to give it a try.
I just got the jar, not the starter kit, which comes with a scoby (symbiotic culture of bacteria and yeast), plus tea and dried spices like hibiscus petals. I live in Portland, Oregon, which has no shortage of tea makers and kombucha producers, so putting together my own starter kit would be no problem.
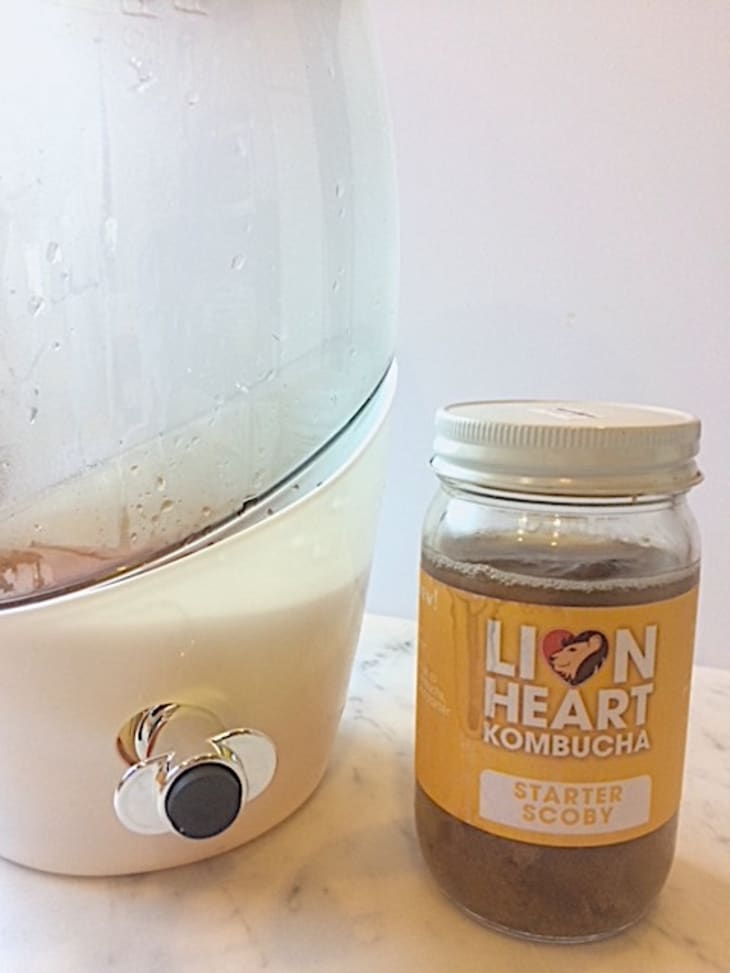
Of course, the instructions that came with the jar assumed I had the company’s scoby, which doesn’t come in a “starter liquid” of kombucha. The scoby I sourced from my local homebrew store was already swimming in the stuff. So I combined its instructions with the ones that come with the jar and muddled through.
Step 1: Wash the jar with distilled vinegar, then allow to air-dry overnight. What? I was ready to brew and didn’t want to wait, but okay fine.
Step 2: Acclimate your scoby to its new environment. This involved brewing a four-cup batch of sweetened tea, letting it cool, then adding to the brewing jar with the scoby and either vinegar or starter liquid. Then you wait again — this time for two to three days.
Step 3: Start the primary fermentation by steeping eight teabags in 16 cups of hot water. I didn’t have bags, just loose-leaf, but it seemed like eight heaping teaspoons was equivalent. Add a cup of sugar and allow to cool. Then add this sweet tea to the stuff in the brewing jar. Cover with the airflow screen and allow to ferment for two weeks or until as sour as you like.
Apparently I really hate waiting because this was really hard. I tried to forget about the kombucha while it did its thing. I even hid the jar in a box because I didn’t want to see it and be reminded that I was waiting. When two weeks were finally up I gave it a taste. I wanted it a little more sour, but my patience was wearing so very thin. I gave it two more days and then called it good enough.
Step 4: Time for the secondary fermentation, when you decant the kombucha into airtight jars, add a little sugar, and let it ferment again. This is how it gets fizzy, since the carbon dioxide produced from the scoby consuming the sugar can’t escape. I hadn’t ordered the company’s cute swing-top glass bottles, but I had plenty of beer growlers lying around, so I washed those thoroughly and gave them a good rinse with distilled vinegar to sterilize. The instructions didn’t say to do it for this step, but it seemed like a good idea (but, no surprise, I did not wait for them to air-dry overnight).
Then I had to do some research. Both sets of my instructions said I could flavor the kombucha with fruit, juice, or herbs, but neither one said how or how much. I decided to go with juice, since fresh fruit seemed risky for this maiden voyage (what if it got moldy?). A quick consult with the interwebs confirmed I should use about 80 to 90 percent kombucha to 10 to 20 percent juice.
To one growler, I added strawberry-beet juice from Trader Joe’s, since it seemed both unobtrusive and also slightly healthy. Instead of sugar, I added some rhubarb syrup from IKEA I had lingering in my fridge. To my other growler, I added fresh ginger and the same syrup.
Adding the kombucha to the jars was a cinch, thanks to that handy spigot. And I made sure to leave about one-third of the kombucha in the jar to keep the scoby alive so I could ferment another batch. This is called “continuous fermentation,” and it seems you can keep it going forever, or until your scoby grows too big and needs to be downsized.
After topping off my growlers with kombucha, I waited once again. This time it was just supposed to take five days until the batch was properly fizzed up.
That’s when I realized making kombucha is as simple as making a giant batch of tea and waiting — and the waiting was most definitely the hardest part. There was waiting every step of the way: waiting for the jar to dry, waiting for the tea to cool, waiting for this to ferment, and that to ferment. So. Much. Waiting.
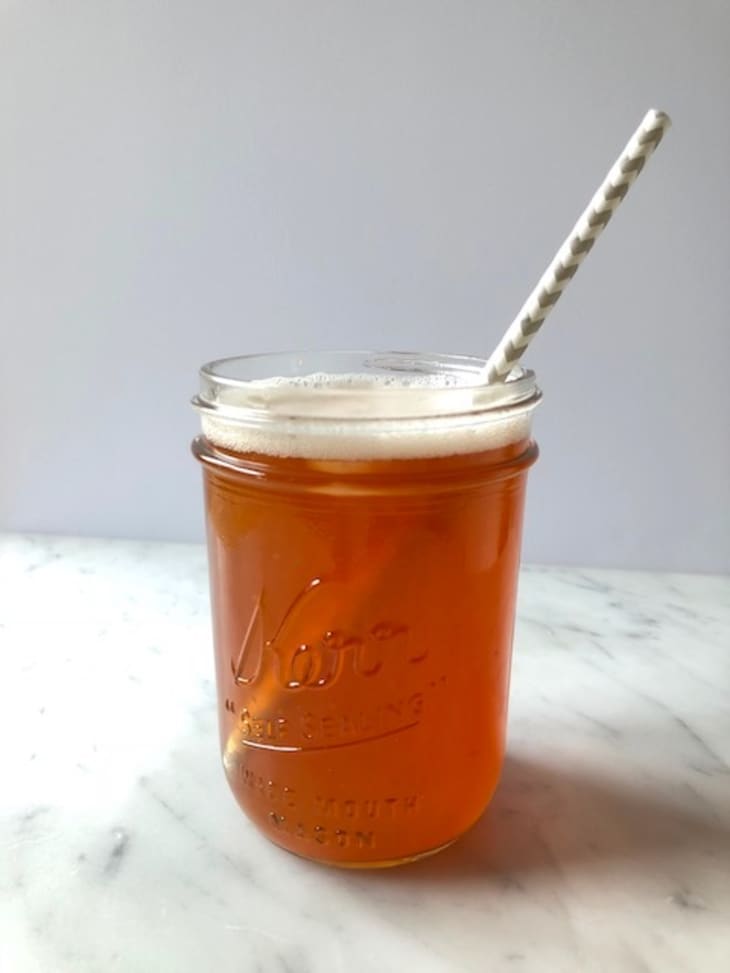
Finally, day five rolled around. I twisted the cap on the juice-infused kombucha and was greeted with a loud and very satisfying hiss. Kombucha success! It was definitely fizzy, mildly sweet with pronounced strawberry flavor, and quite refreshing. It’s still not as tart as I want it to be, but pretty darn good for my first try. The ginger version was definitely less fizzy, but I did a little research and found out it could be because I left too much headspace in the bottle.
I definitely still have a lot to learn. Will my next attempt be better? Well, with my second batch already fermenting, I’ll soon find out — although not soon enough.