
Do You Need to Dimple Burger Patties So They Stay Flat?
When forming hamburger patties, I was always told that you had to make a shallow indentation or dimple in the middle of each patty — this would keep the center from bulging up as it cooked so that the patty would stay flat and even. I never questioned that technique until I came across even more methods on how to do this, so I just had to test them out myself!
The Original Tip
The basic theory is that as meat cooks, the proteins contract so that the whole patty shrinks and puffs up in the middle. Making a kind of indentation or dimple in the middle counteracts that effect so you end up with a nice, even patty. But what kind of indentation do you make? I found three methods:
1. Shallow Indentation: This is the method I’ve always been using, and I usually make a shallow indentation about 1-1/2-inches wide. This seems to be the most popular method, widely used by chefs like Bobby Flay.
→ Read more: The Perfect Burger and All Its Parts – New York Times
2. Deep Indentation: I came across a video on how to shape a burger from Sunset Magazine, where they made quite a deep impression in the center.
3. Dimpling with a Knife: Finally, I saw chef Richard Blais, who owns a burger restaurant, take a knife and essential stab it into the patty a few times during a burger challenge on Top Chef Duels.
The Testing Method
I used my grilled cheeseburger recipe for this test since it makes 4 patties. To make the patties as uniform as possible, I weighed each portion of ground beef to make sure they were equal: 6 ounces (170 grams).

Once I had my four portions, I formed 4 (1/2-inch thick) patties. I wanted to make sure each one was as evenly formed as possible, and since I don’t have a burger mold or press, I broke out a 4-1/4-inch ring mold instead. This also helped me achieve nice even sides on each patty.
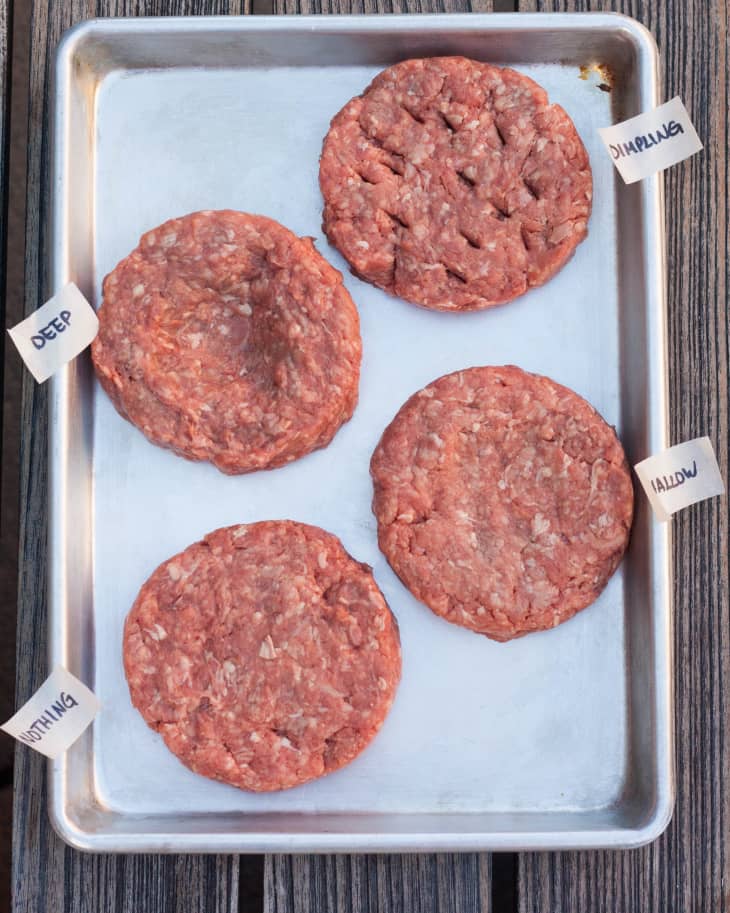
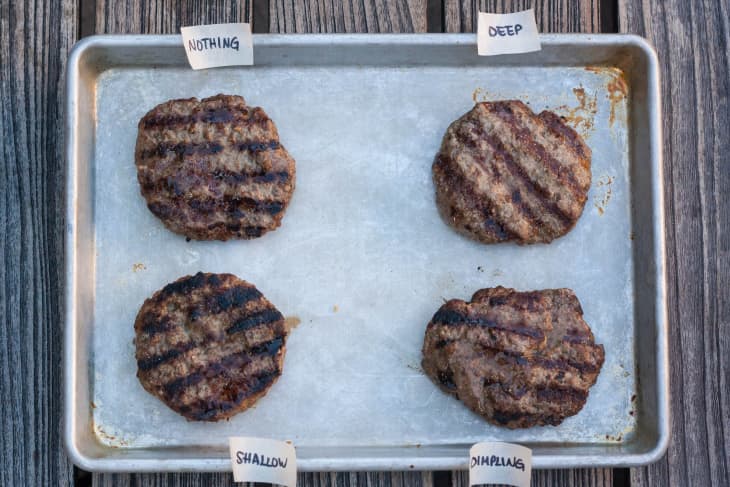
With the 4 patties ready to go, I started making my indentations:
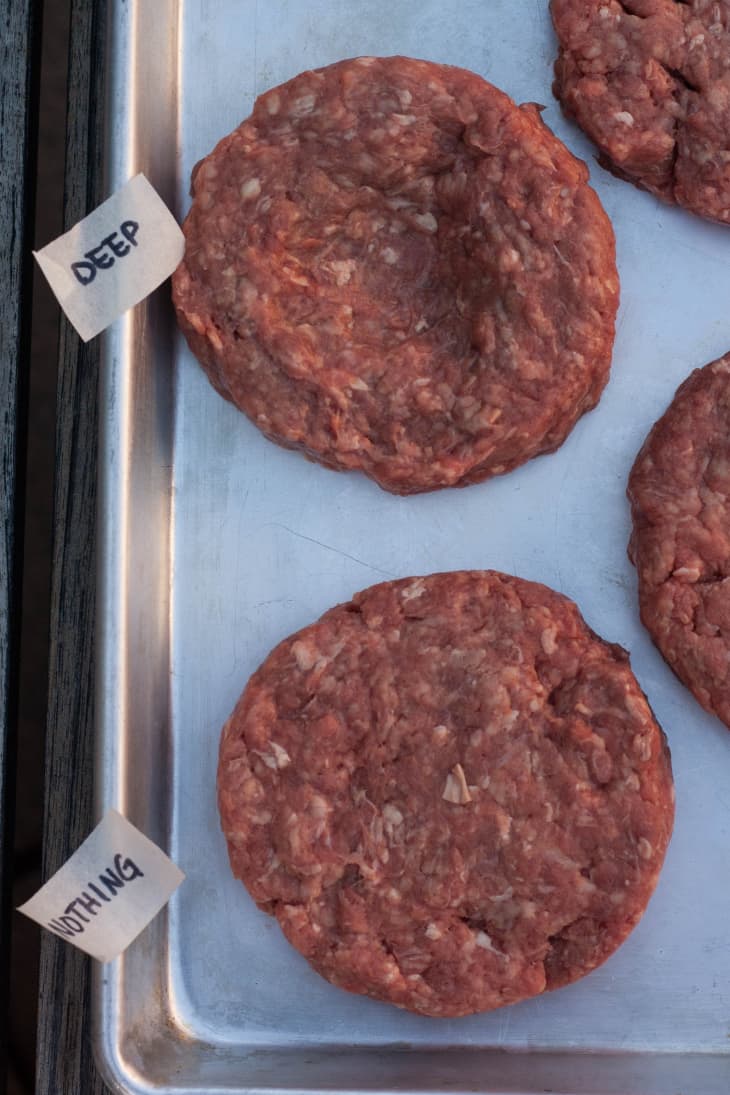
- No Indentation: This would be my control patty to see if perhaps you don’t even need to go through the hassle of doing anything to the patty. Maybe all this talk about bulging patties was a myth?
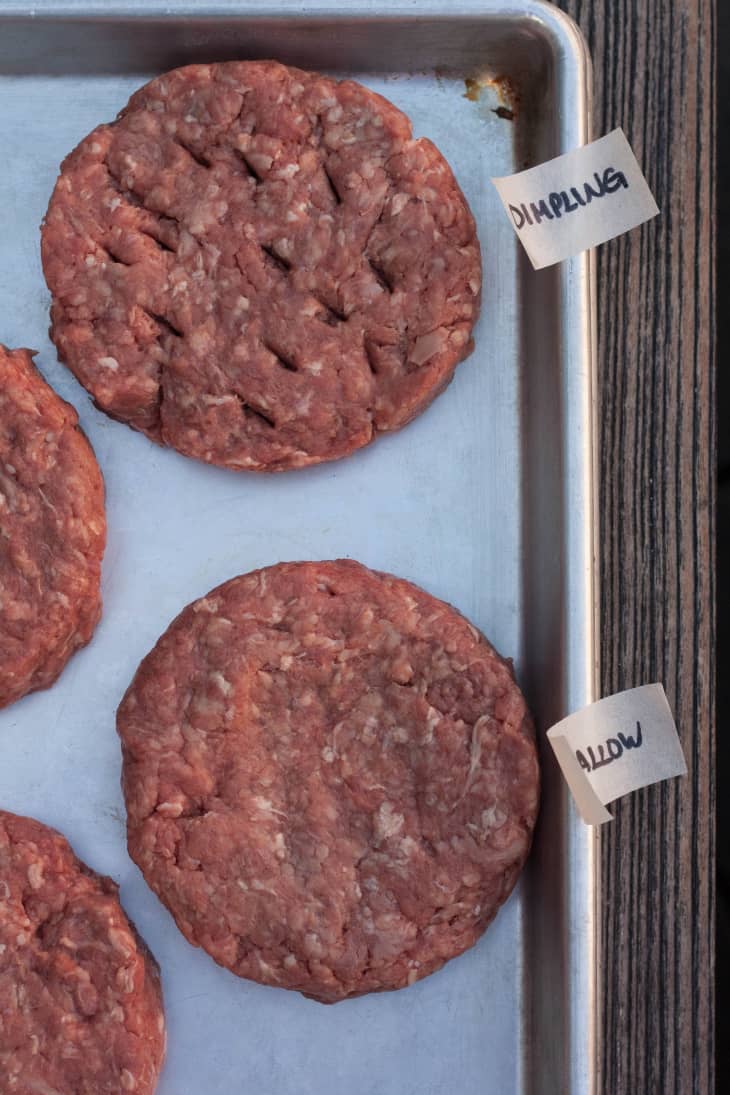
- Shallow Indentation: I used the tips of my fingers to gently make a shallow 1-1/2-inch indentation in the center of the patty.
- Deep Indentation: Again using my fingers, I pushed a deep well in the center of the patty but made sure not to go all the way through.
- Dimpling: Using a small knife, I pushed straight down through the patty about a dozen times.
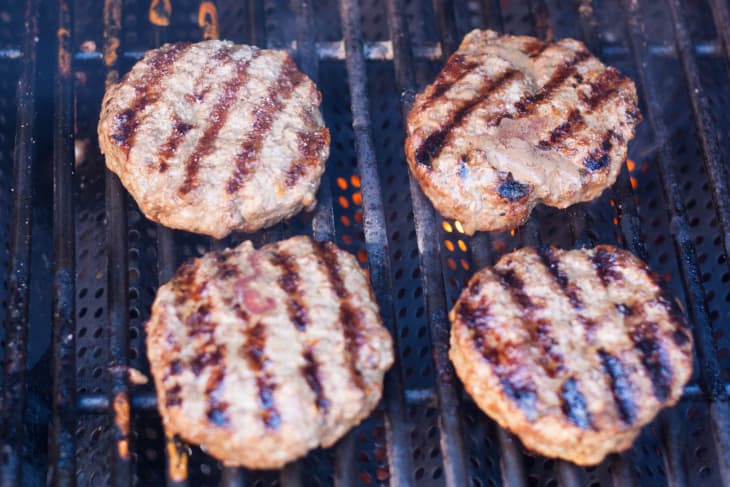
After labeling my tray to make sure I didn’t mix the patties up, it was off to the grill. I grilled them covered over high heat, about 3-4 minutes per side, then pulled them off the grill onto a clean tray to take a look.
The Results
So how did these patties turn out?
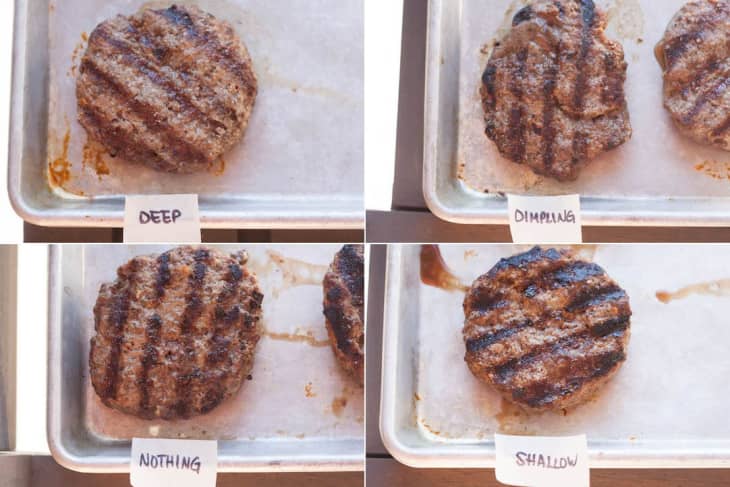
- No Indentation: While the patty was a tiny bit thicker in the middle, it maintained a respectable evenness but not-quite round shape. It measured 3 to 3-1/2 inches across, depending on where you took the measurement.
- Shallow Indentation: Definitely the best looking of the bunch, this patty stayed nice and round and was perfectly even in thickness. It measured 3 inches across.
- Deep Indentation: This one wasn’t too bad, it was mostly round with an uneven edge here and there, but there was an odd-looking indent in the middle. It measured 3-inches across.
- Dimpling: The worst of the bunch, this one was lumpy and had lost its round shape, ending up with raggedy, uneven edges. It measured 3 to 3-1/2 inches across, depending on where you took the measurement.
Verdict: Go with a shallow indentation!
Final Notes
While none of my patties bubbled up in the center to the point where it didn’t look like a hamburger anymore, making a shallow indentation produced the best-looking patty. Kenji over at Serious Eats says that this is because grilling or broiling burgers, where heat hits the edges of the burger, cooks and therefore contracts the meat on the outside more quickly than the middle, resulting in the center puffing. The indent counteracts this effect from those cooking methods.
If you panfry your burger, where the heat mostly comes in contact with just the bottom of the patty, this effect actually doesn’t happen and you don’t have to bother making indentations.
→ Read more: The Burger Lab: How to Shape a Burger For Grilling or Broiling – Serious Eats
So there you have it! Go forth and making those indentations if you want perfectly flat and even burgers!